YDual VL53L0X Distance Sensor
One of the options we are exploring for our rover to find its position is with a distance sensor. Last time we went with single VL53L0X attached to a servo. The idea was that moving it around from -90º to 90º we could scan the rover's surroundings and make decisions. And it worked.
We were able to go through the maze relatively quickly, but observing other competitors we've noticed that those that had 2 or even better 3 distance sensors were able to move much quicker as their position relative to edges and end of the corridor were relayed at the same time. So, this time we decided to have two distance sensors. The original idea was to use ultrasonic sensors (HC SR04) and a breakout board with a ATmega328p connected to the RPi with i2c; More about it in one of the following blogs. In the mean time, until our i2c solution is finished, we've created plan B solution - two VL53L0X sensors on the same i2c bus. Here's the physical design of the holder Prototyping.
But adding two VL53L0X on the same i2c bus is not a simple thing. Unlike many i2c devices, VL53L0X doesn't have a selectable i2c address (usually jumps on the board). It uses separate pins for a logical 'enable' (or in this case 'disable'). Pin XSHUT needs to be set to logical '1' for the sensor to use i2c bus. Internally, it has a pull-up resistor so if not connected it will still work. Setting XSHUT to logical '0' (GND in our case) makes it disabled.
Since we only need two VL53L0X sensors it can be done by simple 'not' gate - where one sensor is directly connected to the spare GPIO of the RPi and another through the 'not' gate. Simple logical circuits are easy to find and use, but in this case would take slightly more space than needed as the same can be achieved by simple transistor!
Here is the schematic for our little adapter for two sensors: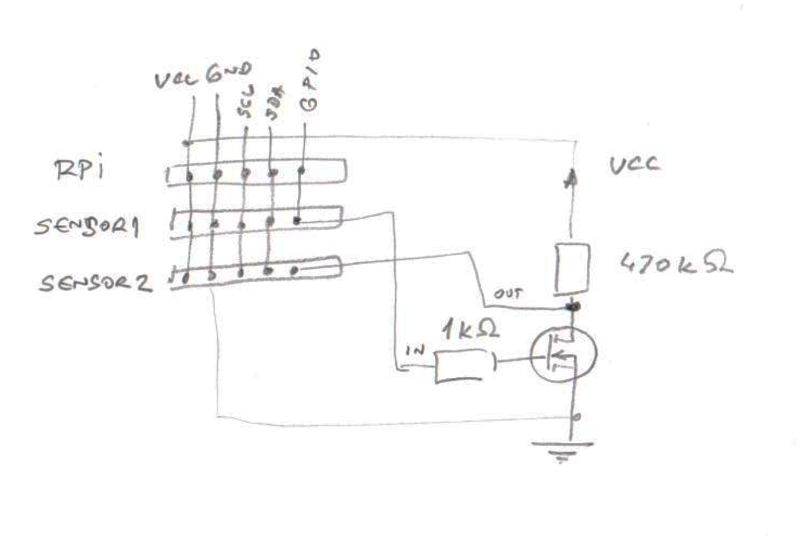 FET transistor 2n7000 (which, btw, I somehow had in box of spares) seemed to be ideal for the 'not' gate.
After sketching the circuit, it was just matter of putting all of it on the breadboard and testing it out. It would have been a 10 minute job if someone didn't forget that Servoblaster on a RPi does not release ports even if they are not actively driven. So, after half an hour of scratching heads and spare, not used, GPIO identified (GPIO 4, which, just to make things worse was set as a one wire interface!) things finally started working!
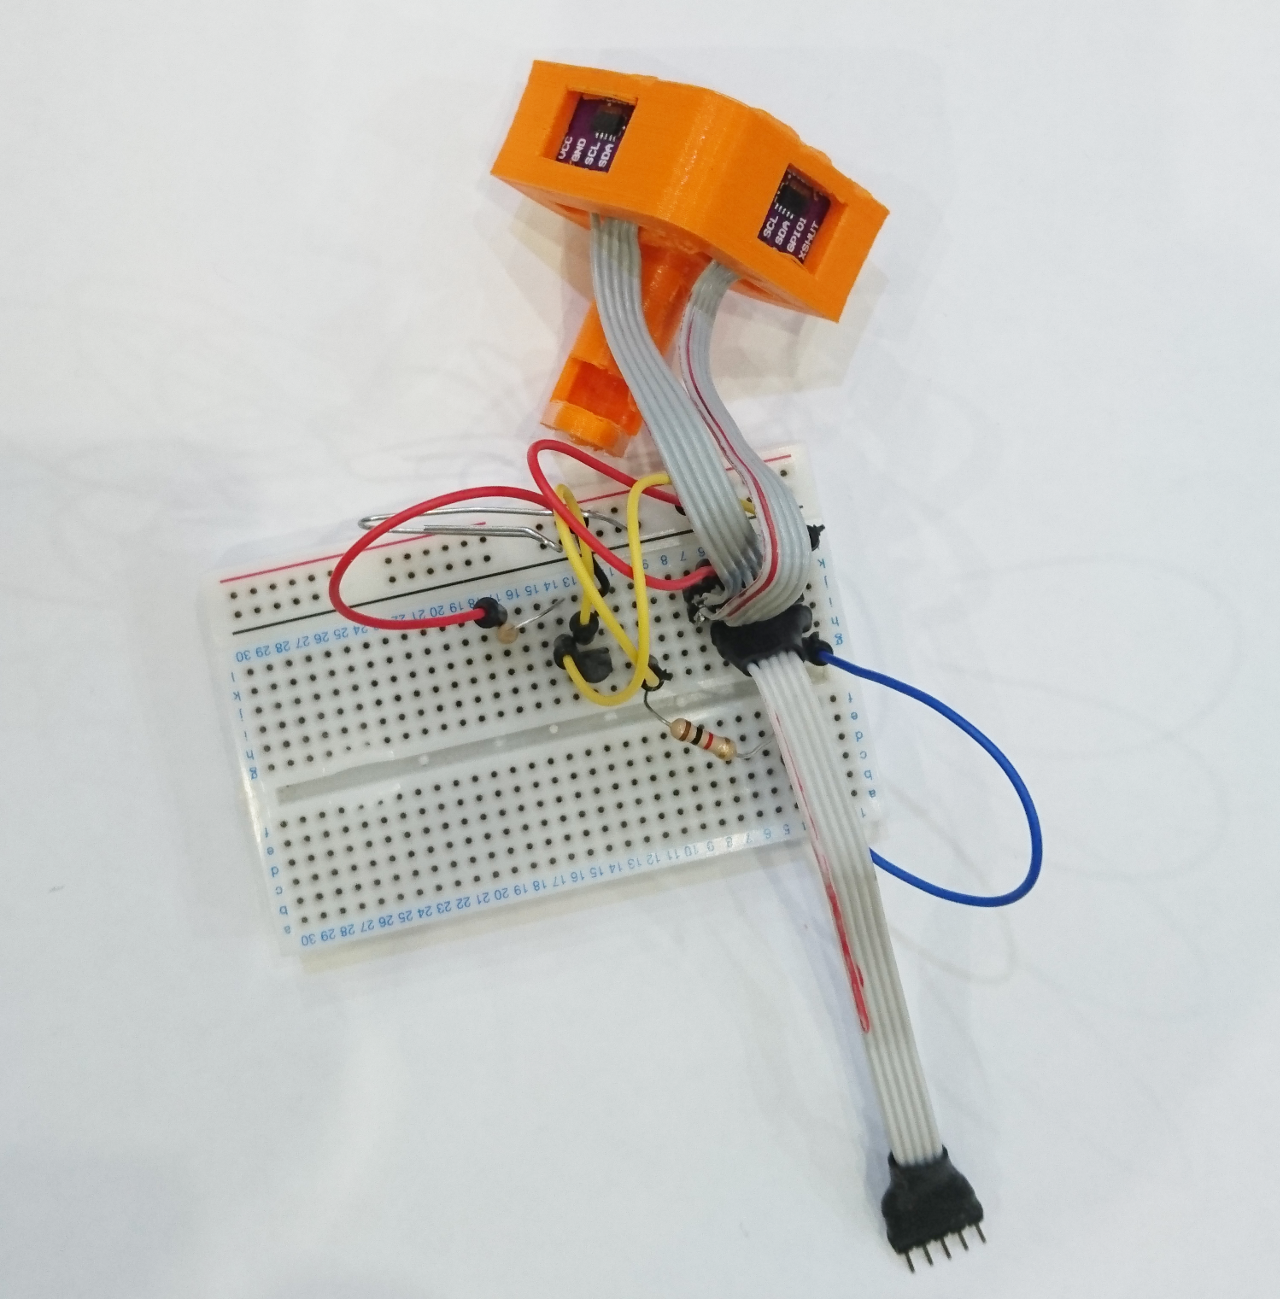
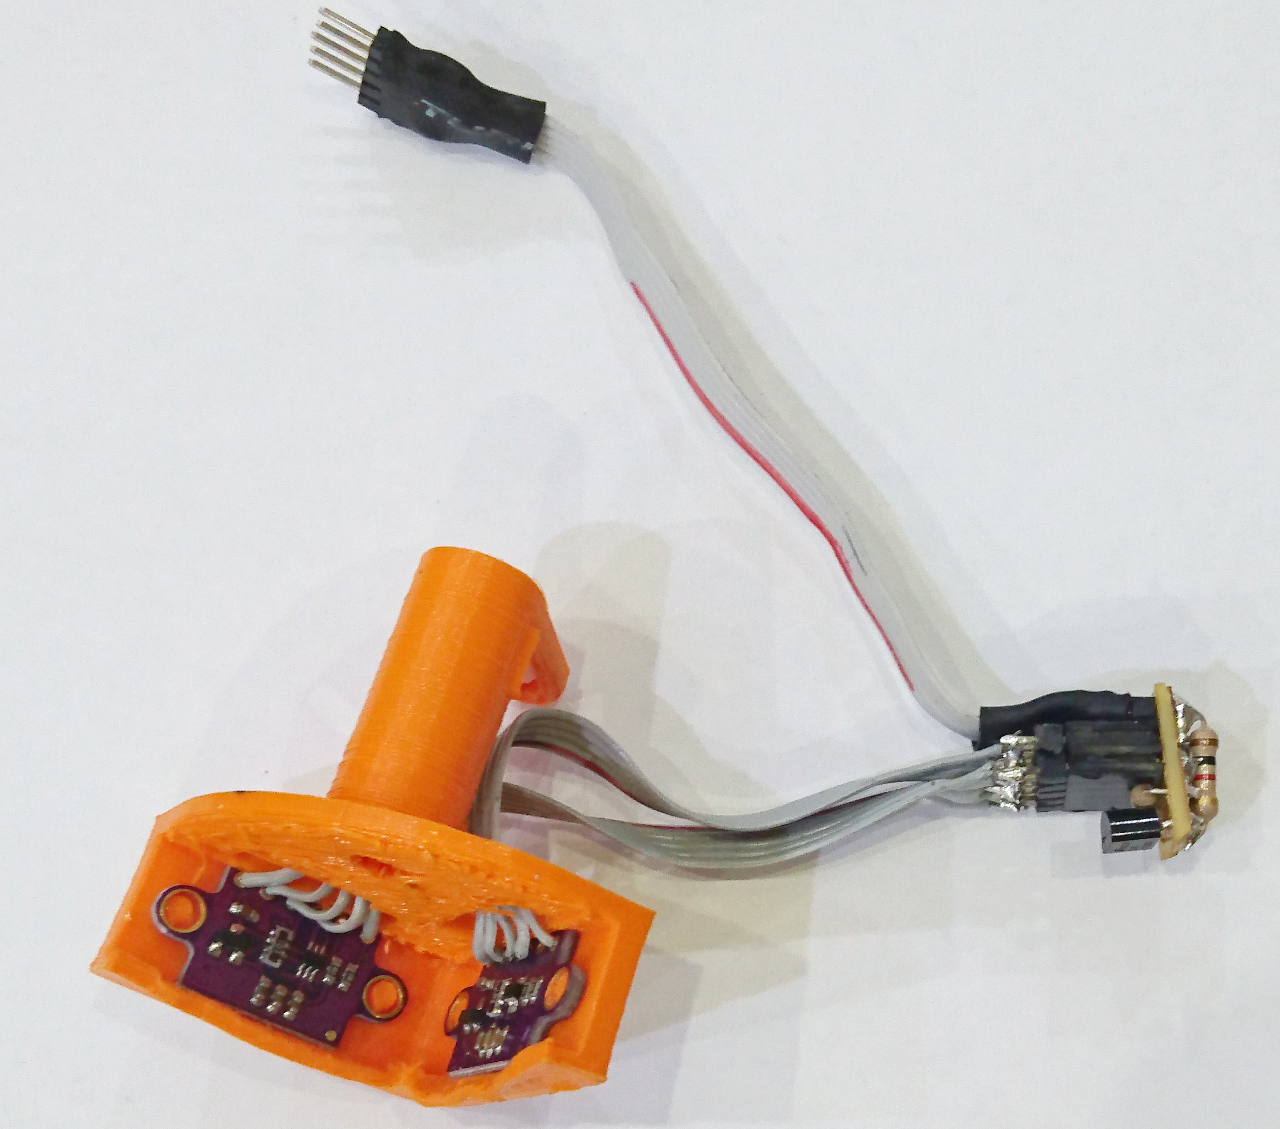
After proof of concept it was quite straightforward - a tiny stripboard PCB with only three lines to break would yield a 15mm x 15mm x 10mm device:
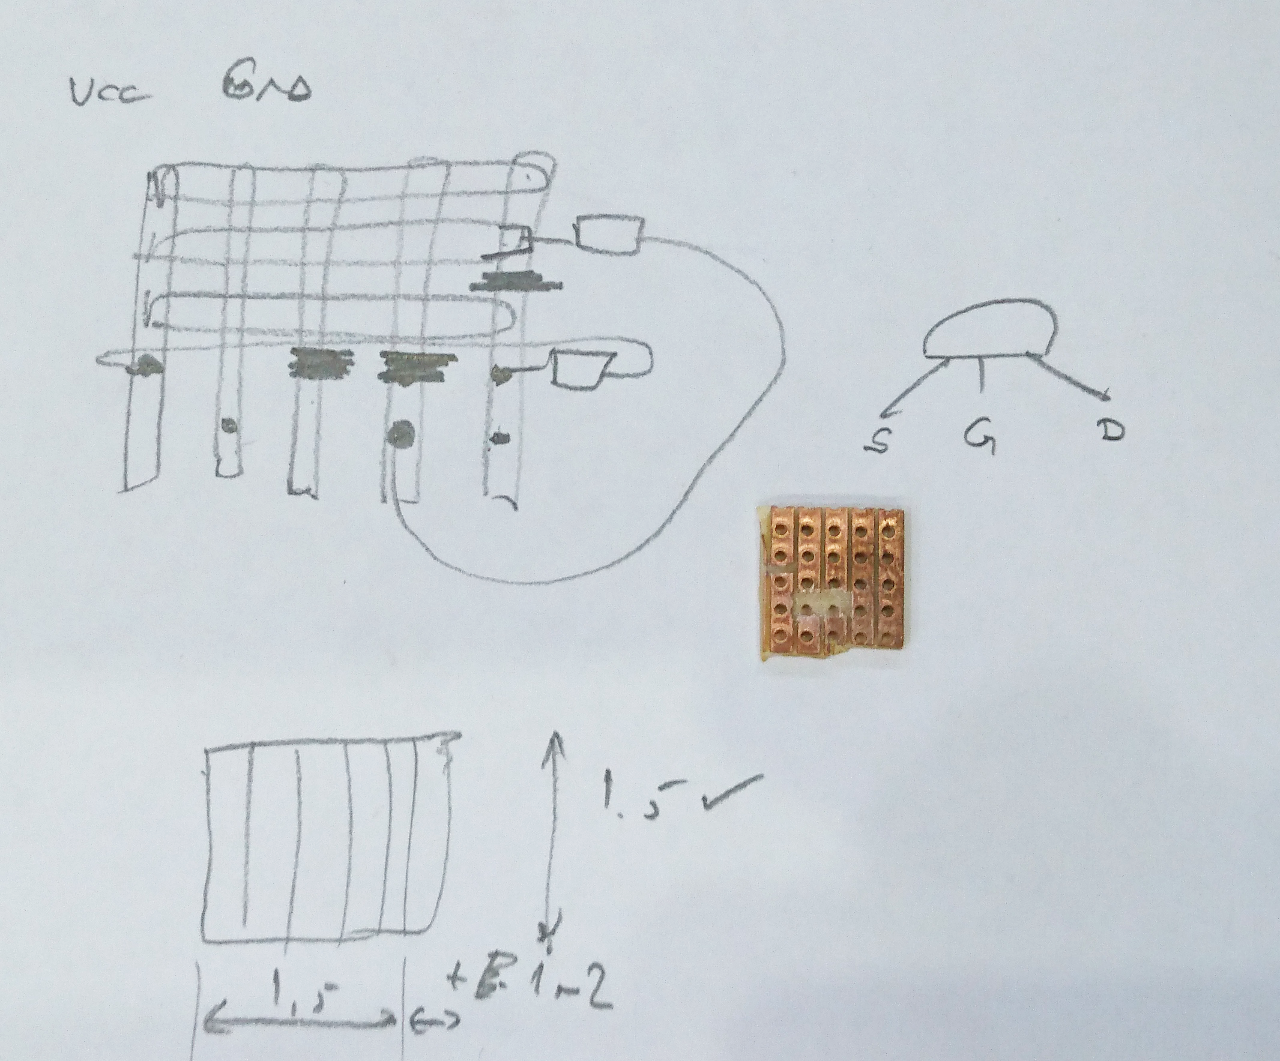
Which after soldering ended up looking like this:
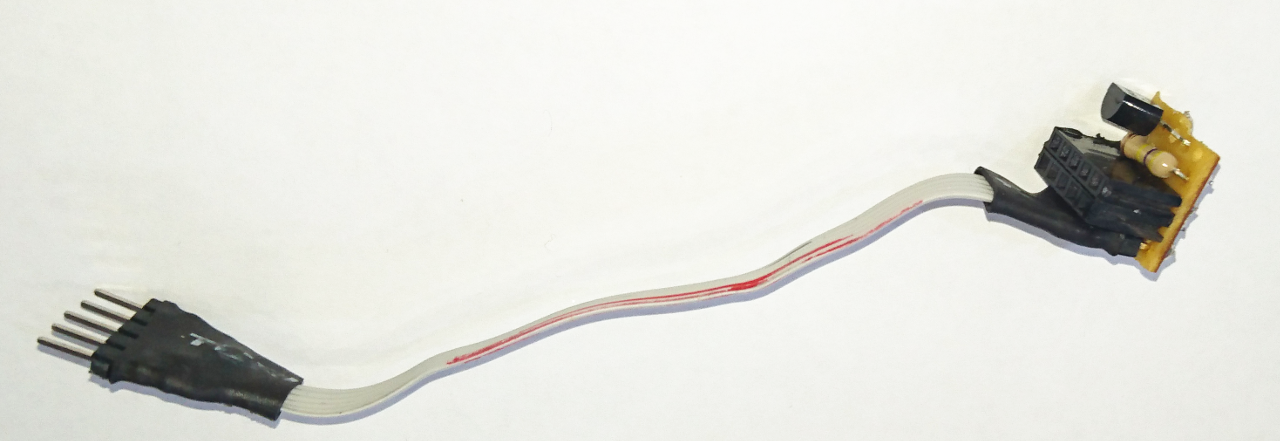
And when is all put together like this:
So here is our GCC Rover M16 with two distance sensors as originally designed here 2018 Inaugural meeting:
[gallery ids="1180,1182,1181" type="rectangular"]
Now we need to only write software to read both and provide values through our PyROS and a few small algorithms (like following wall to the corner or finding corner) to utilise those sensors.
Update: Never read half of a blog/document. The important stuff might be near the end!
The XSHUT pin resets the sensor and enabling it again it needs some time to reset. Fortunately that time is only 1.2ms but setting up the sensor (after boot) takes some time, too, and there is time for ranging (scanning) on top of it. In the above configuration there is now a way having both sensors ranging continuously at the same time. With a not gate software sequence that would:
- reset and enable one sensor
- set it up
- read one off distance
- repeat for second sensor
A much better way is to connect one sensor's XSHUT directly to VCC and the other's to GPIO and utilise another function of the sensor: the ability to change i2c address of the fly! So, after updating the board for FET to keep the VCC on the output our algorithm is now:
- make sure GPIO is high
- check i2c device on address VL53L0X_REG_I2C_ADDRESS + 2 is present. If so go to step 5
- make sure GPIO is low so only one sensor is 'online'. Other is 'shut'...
- change address of device on VL53L0X_REG_I2C_ADDRESS address to VL53L0X_REG_I2C_ADDRESS + 2
- make sure GPIO is high so both sensors are 'online'.
- check if i2c device on address VL53L0X_REG_I2C_ADDRESS + 1 is present. If so finish.
- if not change address of device on VL53L0X_REG_I2C_ADDRESS address to VL53L0X_REG_I2C_ADDRESS + 1
[gallery ids="1231,1230" type="rectangular"]
And output after sensors were initialised:
